Visitors

Showing posts with label creative. Show all posts

Thursday, 28 June 2012

Model making - a hobby rekindled

Model making has always been a keen interest of mine! 
If you ask my parents, I'm sure they will remember my ever-increasing collection of toilet roll tubes, plastic bottles, sheets of card and "model making" materials that often cluttered up my bedroom...

I recently rekindled my enjoyment of this hobby by "purchasing my son" a train set! (Yeah, ok the real reason was so I could play on it!)

After setting it up a few times, dismantling and rebuilding it, it occurred to me that a single loop of track isn't actually very exciting...
It was then I decided that I needed to start creating scenery to make the layout more interesting!

ROCKS AND ROCKY TUNNEL.

Rocks made from Sponge and paint
I first attempted to create some rocks that I can attach onto a model layout.
My rocks were created using some old sponges (washing up sponges were fine), and some brown poster paint.
These types of rocks are very easy to create.

I started by tearing the sponge into pieces that were the rough shape and size of the rocks I wanted.

I then used them to paint each other using the poster paint. It is actually fairly effective, however I'd recommend you use a base colour first, then add different spots and highlights after the first layer of paint has dried.

Mountain tunnel
After leaving my rocks to dry for a while (I think they took about 2 days to dry fully, as they absorb so much paint), I then created a rough tunnel out of an old cardboard box.

My idea here was to add the rocks to the tunnel and create an interesting tunnel for the trains to pass through.

I used PVA glue on the cardboard, and stuck down some kitchen roll first.
My reasoning was the kitchen roll would provide a better surface to stick the rocks to, however it has actually made the rocks harder to attach.
I stopped working on this tunnel shortly after I got as far as I did in this photo, mainly because my tunnel wasn't working as I had hoped.

METAL BUILDINGS.

Making industrial units
My son had sheets of corrugated cardboard, and I decided that this would make an excellent corrugated metal texture if it was painted correctly.

I decided that using this card would be perfect to make some industrial units.

The construction of these units was easy enough, I simply cut out segments of the card and stuck it to some lightweight cardboard boxes I found.
I then painted these with some metal finish acrylic paints I had, and used a dry brush and a mixture of different paint colours to give the metal a weathered look.
Corrugated industrial shed

I was temped to attach some further details to these units - windows, doors etc.

However, I have still not added these features -
I have found that by omitting these features, I can use these units in several different orientations, making for a model that can be used in different locations, depending on the requirements.

I know the corrugated card isn't in the correct scale for a model railway layout.

Despite this knowledge, I am very happy with the way these have come out, and plan on incorporating them (and more I plan on building at a later stage) in a layout.

My Fiance, Jan also wanted to get involved with making models too, so we visited a local model shop, and purchased some card model buildings, produced by Metcalfe Models.

The first model Jan started building was the Goods shed.

The good thing about the Metcalfe models is they are all built up from flat card, most of which is pre-cut and pre-printed to make it easy to create a detailed model building using only a few tools!

I was very surprised by the quality of these models - considering they are made from card, once they have been constructed, they are actually fairly sturdy!

The other model Jan wanted to build was the Semi-detached houses.
These come in a modular form, so you can design them to make streets and residential areas!

MODEL SCENIC.

I started researching into model making on Youtube, and realised that I wanted to start making more scenic models, based on model railway layouts.

Some interesting videos that helped me decide how to start are by Everard Junction,  Woodlands Scenics, Model Railroader Magazine and a guide on How to make a Diorama by StormtheCastle.

I also joined Darlington Model Railway Club, and became involved in working on a club layout - the
Rookhope Mining company.

I then decided to create my first scenic!

This was created over several weeks, using various different materials...

Read my step-by-step guide to see how I built this.

Do you have any models / scenery / model railway layouts you have built?
Do you have any hints or tips you can share? Leave your comments below!

- TheLittlerich

Building a scenic - a step by step guide

For background to why I built this scenic, please read my previous blog!

This is a step by step guide as to how I created this model.
My techniques and materials were selected based on knowledge I picked up from a combination of watching videos online, as well as reading various articles in magazines on how to make model scenery.


My techniques may not be the same as the ones you use, so if you have any techniques or (constructive) comments, please leave them in the comments box below!

STEP 1: THE BASIC SHAPE

I decided to create my scenic layout using the inside of a box.

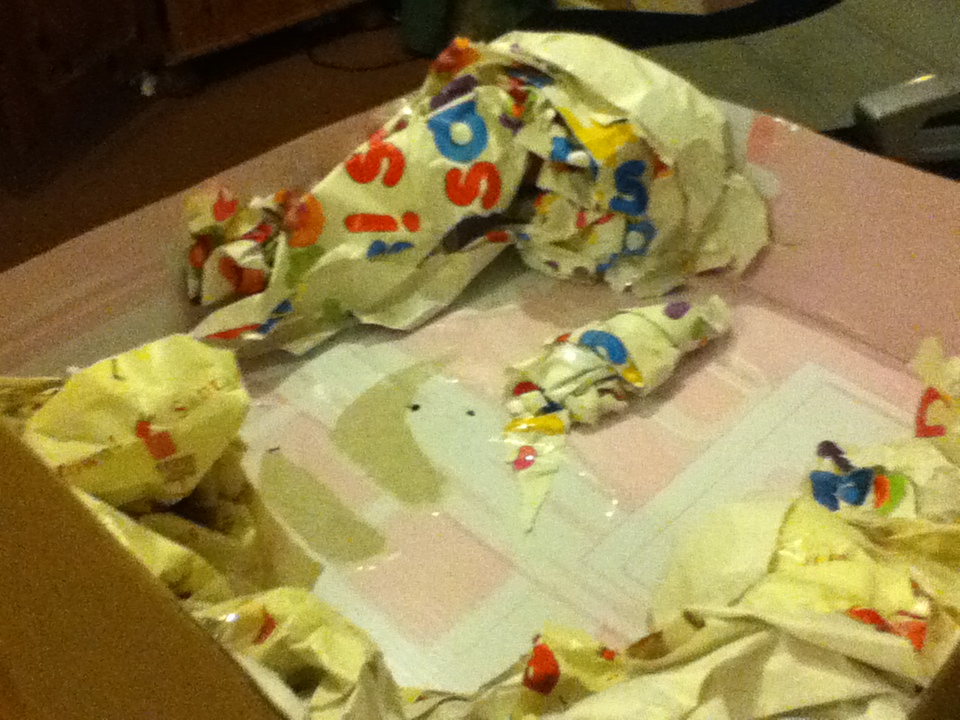
I started to build up a basic shape using some old christmas wrapping paper I found in the back of a cupboard. 

I scrunched it into a rough shape and taped it to the walls of the box, as well as the floor of the box.
When doing this, you can build up the shape using several pieces of paper, and tape it into the rough shape you want the hills / mountains to be. 

I decided that in one corner of the box, I wanted the hills to be quite high, and in the opposite corner I thought a smaller hill would balance it out, and so I added more scrunched up paper in the opposite corner.

With a bit of tweaking, I ended up with an overall shape that I was happy with.

I decided this is an ideal shape to form into a stream, with the higher ground on each side of the water.

STEP 2: BUILDING UP THE ROCKS

The next step was to create a hard rock using the scrunched up paper as a guide to form the shape.

To do this, I mixed up some all purpose filler with water using the instructions on the packet and added in some brown paint (to give the rock a base colour without having to paint it afterwards). 

I dipped strips of kitchen roll into the mixture. 

My son Dominic was keen to get involved in this stage, but once he realised it was as messy, he helped by tearing up the strips of kitchen roll for me!

I then applied this plaster covered kitchen roll over the rolled up paper to form the covered rock surface.

I soon discovered this is a very messy process! 

I also discovered that larger strips of kitchen roll are better to work with than thin strips, as they tend to be easier to lay on flat.

The kitchen roll / plaster mix has a tendency to dry fairly quickly, so I recommend making up smaller batches of the mixture so you don't waste much.

If you are adding paint into the mix, it's also fairly important to get the same mixture of filler / water / paint if you want an even colour to the rock base.

Also, because it is filler that is being used, it will dry into a hard structure, making the rocks sturdy enough to accept any scenery details you add to them!

STEP 3: BASIC GROUND COVER

Once the rocks had dried, and had turned nice and solid (this may take a few days to dry completely, depending on how much filler mixture you use), it was time to start applying the greenery!

Build the greenery up in stages for better results.
I started by applying a layer of 50/50 mixture of PVA glue and water.
There are many different ways you can apply this to your model, however I simply used an old paintbrush and painted the mixture directly onto the formed rock formations.

I then started laying the ground cover, using some green blended turf, made by Woodland Scenics. (This is also known as "flock").

I chose Woodland Scenics items because it was the manufacturer that people often mentioned in the video tutorials I'd watched. 
(It was also the only type available at the local hobby store I bought my materials from!)

There are other model scenery manufacturers who produce other items, however I have not tried anything other than Woodland Scenics materials.

After I had covered the area I wanted with the green blended turf, I used a basic spray bottle filled with "wetted water" - tap water and a few drops of washing up liquid.

The washing up liquid helps break the surface tension so you can apply more PVA glue / water mixture to the flock to help stick it down.

Give the layer of flock a fair soaking with the wetted water, then apply more of the PVA glue / water mixture on top of the flock.
The beer is optional! :)

Again, there are several ways in which you can do this - I used an old plastic syringe to drip the glue / water mix onto the flock.

You could use a pipette to drip the glue on if you have a smallish area to stick down, or simply make up a spray bottle of the glue / water mixture and spray it over the model if you have a large area to cover.

Also remember to be careful - if you squirt the glue / water mixture at your model too hard, the force will wash away / remove some of your texture.

STEP 4: MORE DETAILED GROUND COVER

After I had applied the base coat of the scenery, I started to build up more and more details using various different turfs, foliage and other model materials.

Initially, I was worried about how wet my model seemed to get, however after it is left to dry out, the glue holds the flock and other scenic materials down very well!

After I had set a layer of flock down, sprayed it with wetted water and applied the glue, I then went on and added my next layer, using a different material.

Some of my materials!
I found that the larger the variety of different materials you use for your ground cover, the better results you can achieve!

On this particular model, I ended up using about six different base materials that I had bought.

I started with a mixture of blended turf and coarse turf in different shades of green to make the base grass texture.

Once this had dried and set, I started to add some clump foliage to create small bushes to my scene.


With the clump foliage, I found that using PVA glue by itself works well.
Because the glue is thicker by itself, it gives the heavier material more of a chance to stick to the model.

Again, when I had finished adding materials to my scene, I sprayed the new additional materials with wetted water and then applied the 50/50 mix of PVA glue and water to stick it down firmly.

After these had set, I added some Poly fiber in places to create vines, undergrowth and other rambling vegetation.

The area I planned a waterfall...
My next addition was to include some Lichen in areas to create some more bushes and ground cover.

I found this material felt more moist than the other materials I had worked with, mainly because the lichen is a natural material.

I found this slightly harder to attach to the model, and ended up using PVA glue without a water mix to attach it.

I added some static grass flock patches on the higher hills to create grassy patches.

Initially, my idea for this model was to be a stream, with high rocks and mountains on each side and I also wanted to incorporate a waterfall in the corner of the model.

However, I didn't have any materials that could be used to create water, so my design became a dried out creek bed, once had a train track running through it.

STEP 5: FINISHING TOUCHES

I finished up my model by adding a sandy texture in the creek bed, added some weeds using a mixture of my other materials, and then added a piece of track I painted with poster paint to give the appearance of rust.

I attached some weeds and some small twigs over the track to give it an appearance that it had been left deserted for a while,

I also added an old plastic Shell wagon I had bought from Ebay to the model, however I spent very little time on weathering this so far. (It's on my to do list!)

Voila! Considering this was my first attempt at scenery model making, I am pretty pleased with the final result!


I took my model to the Darlington Model Railway Club and was told about a competition to create a scenery layout in a shoebox, which I plan on entering.

I have also ordered more materials to allow me to add more details to my next model, and will post an update when I create it!


Eventually, I plan on creating a full model railway layout, however this won't be until I have a place to set it up on a more permanent basis!


Please let me know what you think of my layout! 
Do you have any hints, tips or constructive comments? 
Please leave your comments below!

- Thelittlerich

Wednesday, 14 December 2011

How much can a job change your life?

Hi folks! I'm sorry that I havent blogged for ages... I have a lot going on over the last few months, so thought I would write about my updates in one blog, as a way of catching up...


Working in a toy shop: Brilliant fun!
 I think the biggest change is the fact that I now have a job!
It is a part time vacancy, working for a local toy shop in town over Christmas, but it's amazing the difference that getting a job has made to me!

I've secretly always wanted to work in this shop - being a big kid at heart I always imagined it would be quite fun.

When I applied and was called in for an interview, I actually told the manager that I wanted the job because I wanted to play with the toys! Ha ha!

(This approach worked though, because I pretty much nailed the interview and left feeling on a total hype!)

Picking up my uniform...

After being out of work for over a year, and having sent out literally hundreds of applications for job vacancies, now I have found a job I feel a lot less stressed out, frustrated and fed up!

I really enjoy the job, and despite only being within the position for a few weeks, I've had a few of my colleagues mention that I'm doing a really job!

In fact... In the short time that I've been there, I've managed to prove myself to my manager. He has been great and has asked me to work in two seperate stores (he is the manager of both of them!) and because my contract ends before Christmas, he has recommended me for another local store!

I am not sure what he said, but he must've put a very strong recommendation forward because basically I've been head-hunted!

I went into the store that is offering me the job, and without even undergoing an interview I was asked when I could start! Not only that - today they called me up to ask what size uniform I require!
It really is true that once you are in a job, finding another one is soooooooo much easier! I've been emailing my CV and covering letters out for months before I got this job, and now I'm in it, I've secured a permanent job from it!

Yaaay!!

Meer-ry Christmas!

I've also been focusing on a new hobby... Needlecraft! I've been bitten by the bug to sew and stitch fabric together and be creative!

I mentioned starting up a needlecraft hobby to Jan, and she seemed to think it was a good idea. She told me she likes to make the cross-stitch patterns!

If I'm honest, I'd never heard of cross-stitch until she showed me what it was... However we found a couple of kits in a local hobby craft shop, and I started by making a small cross stitch pattern of some meerkats.

I was very pleased once I had completed it, I think it looked pretty cool! 

I fancied making some other stuff, and so I tried making a teddy squirrel from a kit we bought. After maybe 4 or 5 hours of sewing and about half an hour of stuffing I had managed to piece the kit together and make a squirrel!

Stitching up a squirrel....
The following night, I decided to trawl the internet and see if I could find any other soft toys to make... I discovered a great teddy lamb pattern to follow and ended up making my very own lamb, out of my daughters old sleep suit.
I made this! Not Baaaaaad, is it?!
I will admit that the lamb is the one I am most proud of - in my opinion it looks quite professional! I've given it to my daughter and she loves it! (Her reaction was to cuddle it and go "Awwwwww!").

Our next step is to invest in a sewing machine and start making more things, such as cushion covers and other items!

When I showed some of the photos of my creative handywork to a few friends, some of them mentioned that I should make more soft toys and sell them... Who knows - maybe I can start to sell some of my creations online?!

If I don't update before Christmas, then I wish you Merry Christmas, Happy Hanukkah and whatever festive seasons greetings you wish to celebrate!

- Thelittlerich.

Sunday, 23 October 2011

Not blogged in a while...

Hey folks, I am still alive. I admit I've not blogged in quite some time...
I haven't really got any decent reason as to why I haven't put digital pen to digital paper. To be honest, I've just not felt inspired to write much lately.

I have had a few half-ideas for subjects to write about, but the enthusiasm to follow through, research into the subject, find or take pictures and then put it all together in a nice blog has not been flowing...

I can't even blame lack of events going on in my life - since my last blog we've had Dominic's birthday, his birthday party, some job search stuff, the start of our healthy eating drive and today is Jan's birthday...

So if I think about it, I have had a lot to write about... I promise to try and get back into blogging!

- Thelittlerich

Monday, 5 September 2011

Walking the dog brought me inspiration for a story told in poetry.

Walking down the dark path at night; 
For some it brings a fright; others the darkness will excite.
It all depends if the circumstances are right...


The darkness interrupted by the orange glow of the streetlight.
Shining from great height, the glow isn't very bright.
Enough to obscure the darkness with light, enough to give you insight of what might...


...lay in wait!

Your mind: Scenarios; It starts to create
situations you have to evaluate
even though it's difficult to think straight...

You hear a noise, your chest goes tight...
Adrenaline starts pumping: getting ready to fight?
Why did you go out alone tonight?

Something's not right... It's far from great.
Your want to take flight; your legs turn to dead weight...
Remembering a torch, you feel delight. Turning it on, you illuminate
a very familiar sight... 


It's your garden gate!

- TheLittlerich.

Monday, 18 July 2011

Rooftop Arrest.

I was going through some old draft scripts and notes from various ideas that I have had over the years for short films, stories etc, and found a few that I thought I would share with you.


The following short story is one that I wrote many years ago, hasn't actually been read by anybody, and has been sitting in a drawer collecting dust. I thought that I should share it with you in my blog as a way of publishing it.


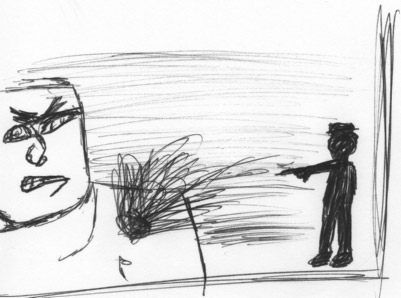
After adding the text, I decided that I should include some illustrations to break it up a little, and so I've quickly doodled some... (I know they are terrible...!)
Apart from the terrible scribblings, I hope you enjoy the story!

- TheLittlerich


Rooftop Arrest.


The warm, female body remained standing, but was only supported by the gripped hands around her neck... His hands...


The hands loosened and she collapsed into a heap on the bed.

Steve woke up with a jump. As the sleepiness and vague memories of the dream subdued, the memories crept back into his consciousness. His dream wasn’t a nightmare, it was real.

The hands around the woman’s neck were his, and the woman was Sarah, his fiancé. At least she was. Until she told him about Alan Halloway, a police sergeant she had an affair with.

In a drunken rage, Steve had started to hit her. Between the cries of pain and the pleads for him to stop, he grabbed hold of her throat and squeezed. Hard. His grip got tighter and tighter.
He could feel Sarah trying to escape the vice grip of his fingers. But as she struggled more and more, his grip became tighter and tighter.

Until she stopped moving...

He suddenly panicked and let go.
She collapsed onto the bed, surrounded with messed up pillows and sheets.
He looked at her. She didn’t move.
"She’s faking it" he thought, he tried to tell himself, until he realized that she wasn’t.

She really was dead. Her chest wasn’t moving, she wasn’t breathing. He hurriedly felt for a heartbeat. Nothing.

"Oh god’ I’ve KILLED her!" he whispered. Then the thought repeated over and over
in his head. "You’ve killed her, you’ve KILLED HER!"
Looking around quickly, he wondered what to do.
"Gotta move, gotta get out of here, QUICK" he thought.

The rest of the time it was hard to remember. He couldn’t remember running away from the house, he couldn’t remember coming to the old apartment building.

The only thing he could remember was killing Sarah. The memories burnt into his mind like a laser. He could see her face, even when he closed his eyes. Her face was burnt into his memory.

It came to him most when he was asleep. He could only dream about what had happened. When he woke, he could not remember for a few seconds. He hoped it was a nightmare, until the memories returned, then he knew what he had done.

Steve was in an old, run down apartment. The rooms were bare, the wallpaper was hanging off the walls, and the place smelt damp. Some of the rooms were worse than others. Some of them weren’t even fit to stay in.


He had fallen asleep on an old couch. The cushions were bare, the pattern had long faded. There were a few springs poking out the bottom, and the seats were damp and smelt bad.

But this was the only place he could go. The police wouldn’t find him here. At least not for some time. Besides, he couldn’t go to any of his family...

His family lived nowhere near him. The nearest person was his sister, Louise. She lived in France. She had done ever since she had been married. Her French husband, Jac, was a complete bastard. He didn’t care about her. He only married her because of the baby.


She had wanted it, but he hadn’t. He was opposed to it ever since she told him. He told her to get an abortion. He even tried to kill it himself. Jac beat her up, kicked her in the stomach and pushed her down the stairs while she was pregnant. Jac didn’t deserved to live in Steve’s mind.


But he hadn’t killed Jac, he had killed Sarah. She didn’t deserve to die.
"I didn’t mean to kill her" he thought, "it was an accident".


The sound of a police siren made Steve look out of the window. He could see a police car speed around the corner. He watched it for a few seconds.
Then he could hear the sound of another one.

Then another... And another!


"How did they find me?" he wondered.
He then ran out of the room, down the stairs and towards the front door. He could see the flashing blue lights through the dirty glass, and quickly turned around and ran towards the back door. He could see more blue lights.

"What the hell?" he thought, “have they brought the entire police station with them?".


He decided that the roof might be a better idea, turned around and ran back up the stairs. He ran into the hall, and through the door that led to the roof. Then he ran up another flight of stairs and to the door where the roof exit was. He pushed the door hard and it gave way.

He pushed the door open wide to see the bright blue sky overhead him.

The roof was gray. He could see a low wall at the end of the roof. Past that, he could see another roof, a little higher, but he could make it.

A loud bang made Steve turn around. The police had broke down the front door.


His heart thumping, Steve ran towards the edge. He stopped just before the wall and looked at the next roof.

It wasn’t far...
He looked down the gap between the two buildings. It was a fair drop, about three storeys. Steve climbed onto the wall as the police emerged from the door.


"Freeze" he heard a police officer shout as Steve jumped.

The next roof was a little further than Steve had expected, and he fell slightly short.
He grabbed hold of a pipe that was sticking out of the floor, and pulled himself up.


As the police officers had reached the wall on the first roof, Steve was back on his feet

and running towards the other end of the roof.

He looked back to see a couple of police officers jump the gap. They had more experience at judging the gap than Steve had, and landed perfectly on the next roof on their feet, and continued running.

Steve ran to the edge and jumped, without thinking about the gap or the distance down. All he thought about was getting away.

He made the jump, but landed funny on his leg. A sharp pain shot up his leg. The pain made him fall to the ground. He grabbed his leg. The pain became very strong. Tears came to his eyes, and his mind became blank, trying to cut the pain out.


A police officer jumped the second ledge and landed next to Steve. Through the tears of pain, he could see the blurry shape of the man standing over him.

"You’re not going anywhere, you son of a bitch" the policeman said in a low tone of voice.

Steve blinked hard and the image of the man became clear.

The man was older than he was. He was well built, but not fat. He had a thick, gray mustache, and his hair was slightly gray, but not balding. He frowned and looked angry.

Then Steve noticed the gun in the man’s hand. It was a Smith and Wesson .22. He recognized it because he had one. He wished he had it with him, but it was under the mattress at home. The mattress where they had probably found Sarah.

A few tears came back into his eyes. He blinked them away.

The man spoke again. "You killed Sarah, and now I am gonna kill you, you piece of..."

He was cut off by another police officer who landed next to Steve.

"Put your gun away, Sarge".

The sergeant turned around and looked at the other police officer as Steve spoke:
"How do you know Sarah?".

It was a bit of a silly question, he would have found out from her identification back at the house.
The sergeant turned around and looked at Steve. He put his face close to Steve’s.

"My name is Sergeant Alan Halloway... You might have heard of me?".

Steve’s mind recognized the name, and then remembered where he had heard it.

"I’m having an affair" he remembered Sarah telling him, "His name is Alan Halloway, he is a police officer".

Then all of the pain disappeared as the anger and hate in Steve grew. He turned towards Alan. This man, the one in front of him now was responsible for Sarah’s death.

Steve wanted revenge, for sleeping with Sarah, for making him break his leg, but mostly for making him so angry that he had killed Sarah.

Steve grabbed hold of the gun and tried to take it from Alan’s hand. Alan had a strong grip, but the sudden fight in Steve made took him by surprise!

They wrestled with the gun as the other police officer drew his gun.
"Freeze!" he shouted as they continued to fight for the gun. Steve threw a punch at Alan’s face. It made contact, and threw Alan back a bit.
He let go of the gun.
Steve aimed the gun at Alan’s head.

BOOM!


The police officer fired at Steve, and the bullet slammed him down against the floor.

The pain shot through Steve’s body.

Alan bent down and took the gun from Steve’s hand. He pointed it at his head.

"What are you doing?" shouted the police officer, "he’s not armed".

"He doesn’t deserve to live, he killed Sarah, and now I’m gonna kill him!".

The police officer now had the gun aimed at Alan’s head.

"If you fire, I’m gonna have to arrest you, Sarge".

"Do what you have to do, but I am gonna kill him" Alan replied. He took aim and slowly pulled the trigger back.


BOOM!

The police officer fired, and the bullet hit Alan in the shoulder. The force threw him down onto the concrete and he dropped his gun. The police officer ran over to the gun and kicked it away from the sergeant.

He pulled out his radio and pressed the button. "Officer down, requesting backup".
"I’m putting you under arrest, Sarge" he said, and then turned around to Steve.

"It’s the cells for you too, but you are going to the hospital first, to get that leg checked
out".

By Richard Stewart

Saturday, 16 July 2011

Writing a blog without a topic...

Starting a blog with no idea as to what topic you are going to be writing about... Probably one of the most difficult things to do on a dreary Saturday afternoon.

OK, so it might not be as difficult as performing brain surgery, piloting a space shuttle or even understanding a foreign language, but it is difficult nonetheless!

Which is why I have almost wiped the screen about four times already and started afresh...

I thought blogging would be an easy task. After all, it's simply writing down what you think and clicking publish, isn't it?
Well, not really... I have a tendency to want to produce high quality work, in whatever medium I am working with at the time, and as a result, I often find I need to satisfy a certain quality I set myself before I offload my ramblings to the world to read.

It is the same when I am working - having worked within a video production based environment for many years, I always try to create work that is as good as possible. (Follow this link for my video production history)
Therefore, why should my blog be any different? Which is why I want to write interesting articles that keep the reader engaged until the end.

I have decided to try and write a blog a day, although this will really depend on whether I have any thoughts that I wish to share or not, and whether I feel they would warrant an article being written about them!

In the meantime, please leave any comments about what you have read so far on The Ponderings..., and also if there are any topics you think I should try ad write about please let me know!

Enjoy the rest of your weekend!

- TheLittlerich

Friday, 15 July 2011

A brief history of Richard M Stewart

Born survivor
Born in Glasgow in 1981 with major heart problems, Richard
fought his early days for survival.

It was as he grew up with constant hospital visits and heart operations, Richard realised he wasn't kit out to be a physical child, and running about, football and sports activities that most children participate in were replaced with computers, gaming and video editing.

Having moved to Cambridge at an early age, Richard was always interested in new technology and computers, and discovered a natural interest in video production when, at 11, he was given the chance to play with the family camcorder.

Richard became the main person in the family who dealt with all video projects, from documenting family christmases and holidays, to filming birthdays and other events.

It was no surprise that a keen interest in film making soon caught Richard, and his earliest pair of films, Attack of the Killer Teddies really captivated his interest in how a film could be recorded and put together.


Starting a career in TV
In 1998, at the age of 17, Richard heard about a local cable TV channel, Cambridge RedTV.

Starting in Cambridge, RedTV was recruiting
volunteers to help make television programmes.

Armed with an application form and a carrier bag full of
home-made portfolio tapes, Richard approached RedTV to see if he could become involved.

He was introduced to Harriet Wallace (who went onto produce Big Breakfast and Watercolour Challenge, amongst other things), given a tour of the building and then asked if he wanted to help on with the broadcast of the RedTV's flagship programme, 528.

Of course, he accepted, and the result was his first television credit EVER: Executive Producer.

Richard's career in television had immediately started, and over the next four years Richard worked for RedTV (completely voluntary!), gaining as much experience and insight into television as he could.

Filming, editing, presenting, graphic design, titles, programme development, vision mixing and broadcasting were all part of the hands-on skills Richard learned.

Often, Richard was given the responsibility of keeping the channel on air, running to schedule, vision mixing and presenting (quite often in the same shift!).

In 2000, Richard was one of four key personnel who helped RedTV at their biggest production ever – an attempt to break the Guinness Record for the Longest live TV broadcast - This meant 18 days of 24/7, completely LIVE broadcasting!
Alas, the record was not officially recorded by Guinness but internally everyone involved knew what they had achieved!

Over the next few years, Richard continued working at RedTV as well as working for other companies, including The Warehouse, a live internet broadcasting house who broadcast live events every weekend. 

His roles involved setting up the network, attending live events and filming / web streaming them online for others to see.


Back to his roots
In late 2003, Richard decided to relocate to his birthplace, Glasgow.

It was during his time working within various temporary office jobs that he discovered the
Glasgow Metropolitan College, and applied for the HNC course to study Television Production and
Operations.

However, with the amount of experience already under his belt, he was accepted straight onto the HND course, and spent the next two years learning the full process of television production, from initial programme concept  through the entire production process, post-production and delivery.

At the Glasgow Metropolitan, Richard was given hands-on training in many different roles within television. 

Training in the first year included camera operations, lighting directing, sound recording, sound dubbing mixing and editing, using Final Cut Pro.

During the first year of his course, Richard shot, edited and directed a 7 minute documentary called "Room 2 Talk" about internet chat rooms, which was nominated for an award.

On the second year, as well as learning editing on Avid, more studio work was introduced, and his roles varied from floor manager and dolly grip to director, production assistant and producer.

During the second year of his course, Richard directed two projects, a short narrative entitled The Cycle of Love and a corporate video about the TV courses, Making TV at The Met.
The latter production was actually used by the college as their promotional DVD for prospective students!

Working for a National broadcaster in Scotland
Having proved in college how much enthusiasm Richard had for the industry really paid off.

After an informal discussion with the head lecturer of the TV course (who was a former employee within the industry), Richard was head hunted by Scottish Television!

Initially this role was a two-week trial within the audio department, however Richard keenly proved himself and was soon working as a VT Assistant, alongside seasoned editors with credits including Fun House, Finders Keepers, Take the High Road, High Times, How2 and Taggart.

As well as assisting with stv's daily promotions, Richard worked on a huge variety of different productions, including Taggart, Rebus, The Making of Rebus, Scotsport, various Setanta football programmes and many, many others.

A position within stv opened, and Richard started working in the transmission area of Setanta Sports, which covered broadcasting of Setanta Sports 1 and 2, Rangers TV and Celtic TV.

Another position opened up within stv to work on Scotland On TV, one of stv's Scottish themed video based websites.
It was here that Richard gained a huge amount of practical experience working with a new media environment.

Over the next two years, the New Media department grew significantly. Richard found his role continued to be extended to include filming and editing new and repackaging broadcast media for the web, seeding content to relative online sources and management of the archival process to store the edited video and data.

Richard was also involved in the initial development of the STV player - an in-house developed catch up service that rivals the iPlayer, 4OD, ITV Player, Sky Player and other online catchup services.

The future?
In Janurary 2010, Richard relocated to Darlington, and is currently seeking an exciting new challenge.

If there are any video production companies or visual businesses who are looking to hire a motivated, enthusiastic individual with the flexibility to work in a variety of media formats, please email Richard on richardmstewart@live.com

I can provide a portfolio of past work and current CV.

Thank you!

- Thelittlerich.